
Add tabs to Shopify product page: 10 minutes without apps
If you wish to add tabs to the product page of your Shopify store, you’re in the right place!
Since you may hear that Shopify doesn’t support adding tabs to product pages, you look for a solution on the Shopify app store. However, in fact, you don’t need an app for that. Adding tabs to your product page in Shopify is much easier than you think. Even those without a technical background can do it within 10 minutes!
So here is the step-by-step guideline for you on how to add tabs to the Shopify store.
How to add tabs to Shopify product page without application?
This tutorial will instruct you on the basic code to add tabs to your Shopify product page without installing any application from the app store.
Remember that, each theme has different files depending on the developer but basically, there is a file system to declare.
In case you can’t find what you want, just drop us a message, we’ll get back to you right away.
Now, take steps to the following guideline, find the correct file, add the code as instructed, and you will find it “a piece of cake”.
Let’s start!

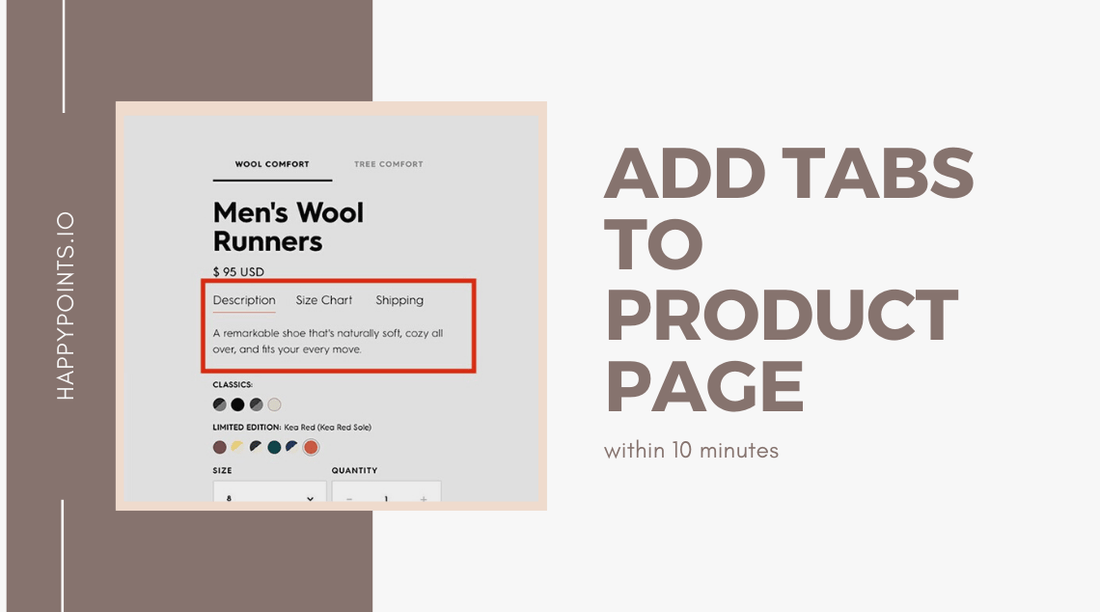
The current demo will have 3 tabs:
- Product description tab
- Shipping tab (which is taken from a page called Shipping)
- Policy tab (whose content is taken from a page called Policy)
To do that, we’ll directly insert code in the theme optimization.
Step 1: Open “Edit Code“
Go to Themes > Action > Edit Code

Step 2: Find the product-template.liquid file
Scroll down to the “Sections”, then find the product-template.liquid or enter product-template.liquid in the search box.

Step 3: Find position of {{ product.description }}
To do this, open product-template.liquid, then use Ctrl + F (for Windows) or Command + F (for Mac).

Step 4: Editing code
Replace {{ product.description }} with the following code:
<div class="tab-customize">
<button class="tablinks-cus" onclick="openTab(event, 'tab-1')" id="tab-cus-active" >Information</button>
<button class="tablinks-cus" onclick="openTab(event, 'tab-2')">Shipping</button>
<button class="tablinks-cus" onclick="openTab(event, 'tab-3')">Policy</button>
</div>
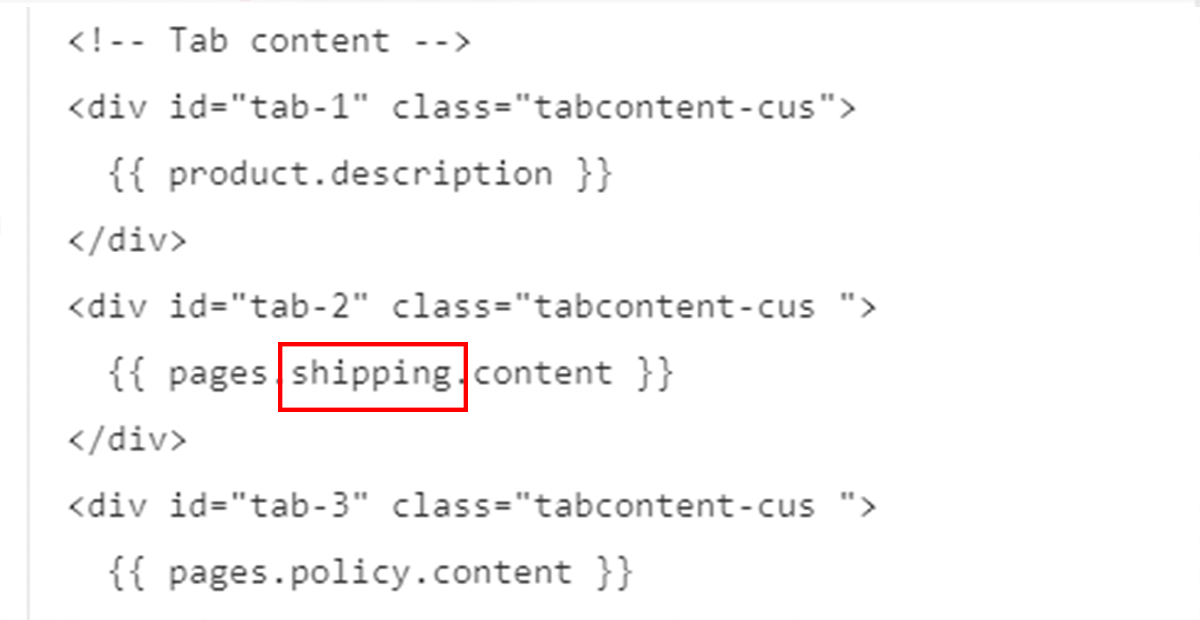
<!-- Tab content -->
<div id="tab-1" class="tabcontent-cus">
{{ product.description }}
</div>
<div id="tab-2" class="tabcontent-cus ">
{{ pages.shipping.content }}
</div>
<div id="tab-3" class="tabcontent-cus ">
{{ pages.policy.content }}
</div>
<style>
.tab-customize {
overflow: hidden;
border: 1px solid #ccc;
background-color: #f1f1f1;
}
.tab-customize button {
background-color: inherit;
float: left;
border: none;
outline: none;
cursor: pointer;
padding: 14px 16px;
transition: 0.3s;
}
.tab-customize button:hover {
background-color: #ddd;
}
.tab-customize button.active {
background-color: #ccc;
}
.tabcontent-cus {
display: none;
padding: 6px 12px;
border: 1px solid #ccc;
border-top: none;
}
</style>Step 5: Click Save
Step 6: Open the file theme.js
Then, insert the following script at the end of the file:
function openTab(evt, cityName) {
  var i, tabcontent, tablinks;
  tabcontent = document.getElementsByClassName("tabcontent-cus");
  for (i = 0; i < tabcontent.length; i++) {
    tabcontent[i].style.display = "none";
  }
  tablinks = document.getElementsByClassName("tablinks-cus");
  for (i = 0; i < tablinks.length; i++) {
    tablinks[i].className = tablinks[i].className.replace(" active", "");
  }
  document.getElementById(cityName).style.display = "block";
  evt.currentTarget.className += " active";
}
document.getElementById("tab-cus-active").click();
Step 7: Click Save to save your process.
Step 8: Add new page
Go to Pages in your Shopify Admin > Add page

Step 9: Fill in information for your new page
With tab 1: The content for this tab is the product description.
With tab 2: Add a new page named “Shipping” as the example below (or you can choose any name you want).
Remember, while adding information to the new page, make sure the handle of that page is the value of the variable in the code on the product page above.

For tab 3, do the same as tab 2, add another page named Policy, add the necessary information.
Step 10: Go to any product page on your store and…
TADAAAAA…
You did it!
Enjoy the result
Easy huh?
As you can see, adding tabs for your product page is not as hard as you think. Therefore, I bet you can do it yourself with just several simple steps.
No application installing, no technical background needed.
It’s not so scary!
